Thursday, August 29, 2019

Too Cool for Back to School

Hey y'all, raise your hands if you are excited about you kids going Back To School 🙋  Don't get me wrong, I love my kids, but this Mama needs some me-time.  This year, my kiddos are both starting at new schools, so they need to put their best feet forward.  We start by going through the clothes they already have to see what fits or no longer fits, and what gaps there are.  While going through my daughter's wardrobe, we found these amazing Phresh Jeggings that I made her last fall and never really showed off.  So when Suzanne asked me to participate in the Back To School blog tour, I knew what I would share with y'all.  I introduce to you Moto Styled Phresh Jeggings (or Real Deal Jeans if you choose)!


Of course, I'm happy to help you to make a pair for yourself or your special girl.  I started by printing and cutting a size 14 pattern because that's what fit my kiddo.  The front piece is where all the fun happens, so set the rest of the pattern pieces aside.  You'll also need a good ruler, tissue or medical paper to trace your new pieces onto, a chalk marker, and pens (preferably multicolored).

Start by laying out your front piece.  Find where the knee breaks.  This can usually be done by folding the hem of the pattern piece to the waistline.  You can double check by holding up the pattern piece to your model if they are available.  Draw a line straight across, making sure to stay perpendicular to the grainline. Using your ruler, mark parallel lines  2" above and below the knee line.  You may want to decrease the distance for smaller sizes.  Clearly mark these sections as "above knee," "below knee," and "lower leg."  It would also be a good idea to mark the inseam and outseam.  It will be useful to differentiate the inseam and outseam when you are trying to put all the pieces back together.  Lastly, you need to draw a diagonal line for the pintucked piece.  I drew my line by marking 4' above the upper knee line on the inseam and 8" on the outseam.  You can adjust your line to where it is pleasing to you, because, after all, this is sewing and we do what we want.  Label these pieces.
Now that you've marked up your paper pattern, it's time to trace them off and add your seam allowances.  You can do this either by cutting up your marked pattern or by folding your marked pattern and tracing them off piece by piece.  Each new seam you are creating needs a 3/8" seam allowance, just like the rest of the pattern.  


You can cut your pieces, with the exception of the moto panels.  For the moto panels, you want a long rectangle slightly wider than the pattern piece.  Measure 7/8" from the bottom, mark a horizontal chalk line.  Continue to mark lines every 1/2"  up the length of your panel.  Once your panel is marked, you're ready to stitch your pintucks.  Starting at the bottom, fold and press the piece at the marked line, then stitch 1/8" from the fold using your topstitching method of choice.  Continue folding, pressing and stitching each line until you've sewn them all.  Press your pintucks toward the bottom of the panel and cut your pattern pieces.  Remember to mirror your cuts.  You don't want to waste tour hard work.


With all your front pieces now prepped, you should have 5 pieces per leg (10 total).  If you have everything cut, you are ready to assemble your moto-styled front piece for the Phresh Jeggings.  Sew the pieces together, then finish and topstitch your seams.


Finish the pattern construction per the instructions, and et voila, you have a rad pair of moto jeans for the too cool for school girl in your life.  


I promise you can do this!


Don't miss out on any of these inspirational posts:<br />
<br />
Monday:<br />
Suzanne of <a href="https://www.winterweardesigns.com/blogs/news" target="_blank">Winter Wear Designs</a><br />
<br />
Tuesday:<br />
Alyssa of <a href="http://thesewinggoatherd.blogspot.com/" target="_blank">The Sewing Goatherd</a><br />
Laurie of <a href="https://thebearandpeaatelier.wordpress.com/2018/08/31/back-2-school-with-winter-wear-designs/" target="_blank">Make it Sew with the Bear and the Pea Atelier</a><br />
Diane of <a href="https://sewingwithd.wordpress.com/2018/08/30/back-2-school-with-winter-wear-designs/" target="_blank">Sewing with D</a><br />
<br />
Wednesday:<br />
Suzanne of <a href="https://www.winterweardesigns.com/blogs/news" target="_blank">Winter Wear Designs&nbsp;</a><br />
<br />
Thursday:<br />
Alyssa of <a href="http://thesewinggoatherd.blogspot.com/" target="_blank">The Sewing Goatherd</a><br />
Rachel of <a href="https://violetsandjewels.wordpress.com/2018/08/28/new-season-fall-sewing/" target="_blank">Violets and Jewels</a><br />
Jackie of <a href="https://jaxxofalltrades.blogspot.com/2018/08/best-dressed-girl.html" target="_blank">Jaxx of All Trades</a><br />
<br />
Friday:<br />
Laura of <a href="https://custommadebylaura.blogspot.com/2018/08/back-to-busy-wearing-winter-wear-designs.html" target="_blank">Custom Made by Laura</a><br />
Liv of <a href="https://www.liviality.com/back-2-school-with-winter-wear-designs/" target="_blank">Liviality</a>

Thursday, August 30, 2018

Best Dressed Girl

Hey y'all.  When Suzanne asked me to join the Winter Wear Designs Back to School blog tour, I decided it was time to dust off this blog.  I keep meaning to blog for myself more, so what better opportunity than now?  I've loved Winter Wear Designs from the very beginning and you can probably see me or my children in many of the patterns in Suzanne's catalog.  I haven't been able to test as much with her lately, but she hooked me up with an advance copy of the Fashionista Jean Jacket just for this tour.


Chicabiddy is growing up before my eyes and her sense of style is developing.  Every cool girl needs a rad jacket, and this Mama can sew.  After verifying her measurements, I prepped the pattern in a size 10.  I didn't modify the pattern except to add two inches to the sleeve length because kiddo is built like her Mama.  We chose a white denim and I got to work while the kids went fishing with their dad.  

The jacket came together quickly and beautifully, so that by the time they returned from their fishing adventures, I was already halfway through the construction.  I took my time, and used topstitching as a design feature by using a caramel thread to create a beautiful contrast.  Swapping threads in and out of the machine slowed me down, but it really was worth it!


It wasn't long before I had a finished jacket, bands and all.  It just needed closures.  Snaps have become a favorite closure for me.  I get to use a leather punch to create holes for the snaps to fit into, and then I get to hammer the snaps together.  Who says tools are just for the garage?  It's fun and cathartic.  It's also incredibly noisy, so I do warn my family before I get started.  I chose dark copper heavy duty snaps because they coordinated so well with the color of the topstitching.  Sadly, I set the snaps so that the jacket closes left over right instead of right over left.  Most people probably won't notice, but I strive to identify and acknowledge my mistakes.  


For Back to School, we paired it with an easy tank and her favorite store-bought jeans.  She loves her new jacket, using words like "rad!" and "awesome!"  It's what every Mama Maker likes to hear!


Until next time


Don't miss out on any of the stops on the 
Back 2 School Blog Tour 2018

Monday 8/27
Intro from Winter Wear Designs

Tuesday 8/28
Larissa of Connected by a Thread

Wednesday 8/29
Carrie of BeriBee Designs
Livia of  Liviality

Thursday 8/30
Diane of Sewing With D
Jackie of

Friday 8/31
Jessica of Jot Designs
Patricia of Sew Far North

Monday, November 2, 2015

A Classic Tee

When a PDF designer you like and respect asks you to sew up her latest pattern and get a few pictures by the next day, you do it.  That's what happened last week when Jodi, of Jocole, asked me to try out her Ladies Classic Knit Tee.  She sent me the pattern Monday night, and while the kids were at school on Tuesday, I got to work. 
 
 
From the time I hit print to when I pressed my final seam, it took maybe three hours.  That includes walking the kids to school, stopping to have conversations with my husband, and staring at my stash before I even cut a thing. The hardest part of this tee was choosing my fabric.  In this case, I wanted something with a print that would be visually interesting.  I found this little floral knit from a previous Girl Charlee Knit Fix in my stash.  Though, to be honest, I really do need solid long sleeve tees in my wardrobe.  This tee will be perfect for that!  But solids just aren't as fun to take pictures of. 


As you can see, this pattern has several options to choose from. 
 
I chose the scoop neckline because it's a flattering cut for me but is still modest.  I also like where the hem of the shirt is.  Even though I'm a tall girl, I have a regular length, borderline short, torso.  Sometimes tee-shirts are really long on me then bunch weirdly.  This one doesn't. Lastly, I chose the longest sleeve option possible.  I really love the way the sleeve bells slightly at the end. It's nice little feminine detail.   
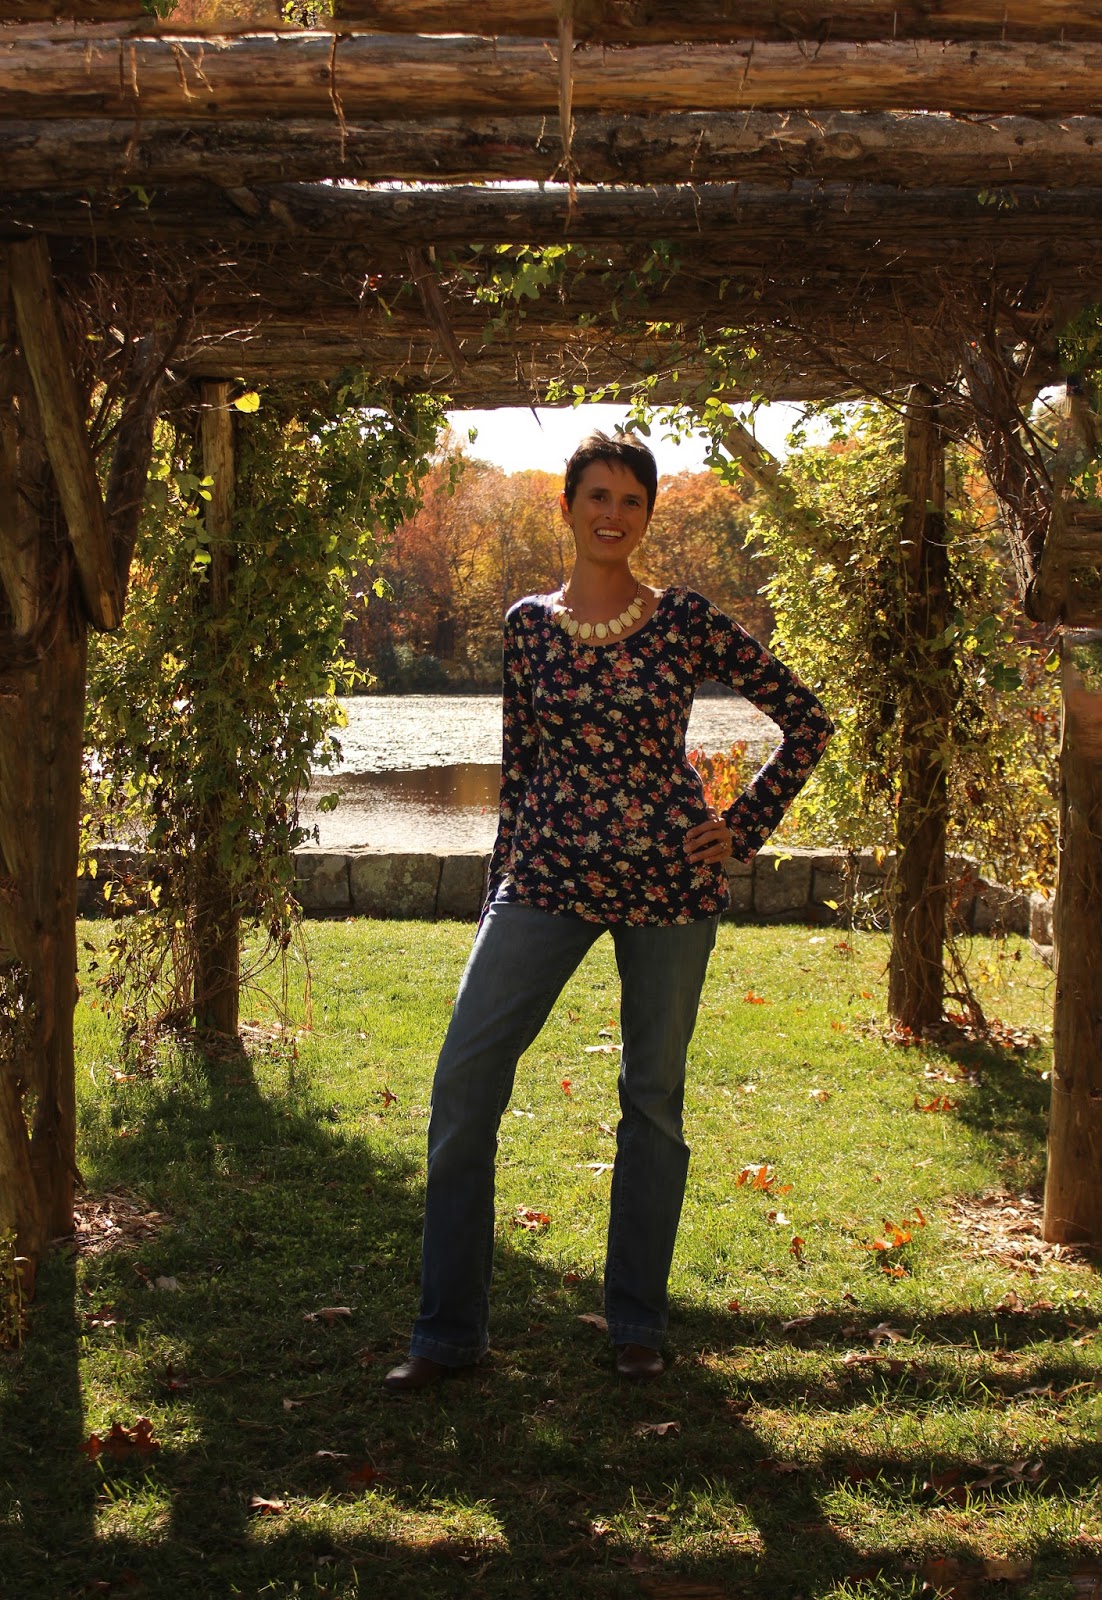


By noon, I was headed out the door with my camera, remote, and tripod to the Arboretum nearby.  How gorgeous is this foliage?  You'll be seeing a lot of this place, I think. 
 
I'm delighted that I was able to rise to Jodi's challenge of sewing and photographing something in a single day.  I think I nailed it, and I know Jodi did!
 
Thank you for stopping by!  Have a wonderful day!
 

Sunday, October 11, 2015

Baby It's Cold Outside

Hubs is in the Navy.  This means we move.  Often.  For the last three glorious years, we were stationed in Hawaii.  It was wonderful!!!  We were in shorts and tank tops all year.  Our only interaction with snow was in a snow cone, though there it's called shave ice. 
 
And then it was time to move.  To New England.  Just in time for winter! 
Y'all, I'm freezing!  All.  The.  Time!!
 
I cracked open my bin of winter clothes that haven't seen daylight in years, and I was so disappointed.  Most of it doesn't fit, and not because any weight gained or lost.  I used to buy things two to three sizes too big just to get the sleeves to hit at my wrists.  But I spent the last few years getting pickier about fit.  Why bother sewing if I am willing to wear garments that don't fit well? 
 
During a recent shopping outing with Mama, I saw a super cute moto-style sweater jacket. I tried it on, but my arms were about 3 inches longer than the sleeves.  You'll realize this is a common theme for me.  I had been considering making a faux leather moto-jacket this fall, but I knew a sweater one would be much more versatile, not to mention the materials would be far more affordable.  I had gotten the Evergreen pattern by Hey June months ago, and knew it would be a perfect pattern for what I had in mind.  I found some cozy sweater fleece at the fabric store, and it was game on.
 
The pattern printed out nicely and everything lined up perfectly.  I didn't make any changes, except to add four inches (yes, you read that right, 4!) to the sleeve length.  My sweater fleece is so dense that I killed my Fiskars rotary cutter, but I eventually got it all cut and ready.  The instructions were clear and concise.  Right away, I was sewing zippered welt pockets.  It's details like these that totally make the pattern exciting for me!
 
Eventually, I got to sew in the asymmetrical zipper that makes this jacket truly moto- styled.  I even got to play with pliers (once I found them, that is) to remove some of the metal teeth from my zipper.  The pattern includes notches that tell you exactly where to start your zipper so that everything will line up perfectly at the end. 
 
I did have a few hiccups, but they were all my fault.  I sewed a piece on backwards and had to cut it off and recut the piece from my remaining fabric.  Then I ran out of thread while topstitching my collar.  But the quilt shop down the hill had what I needed.  With dinner in the crockpot and the kids playing with friends, I got back to work. 
 
 
Once I got this far, it was a matter of attaching the sleeves and closing up that bottom band.  It was a late night sewing, and I was completely exhausted the next day, but I wasn't cold! 


I finished this beauty two days ago, and have worn it every day since.  It's tremendously warm and cozy.  And best yet, it fits.  My thin blooded arms aren't exposed to the wind and cold temps that send me hurrying toward heated shelter.  In fact, I got a little toasty during today's outing to the apple orchard.


This was not a fast sew.  It took me several days to work on, but it was absolutely worth the time and effort.  I've dubbed this a Mary Poppins pattern - practically perfect in every way!  I want to live in it, and expect I will! 
 
Thanks for stopping by!  Y'all have a great day!

Welcome


Hi y'all, I'm Jackie, though somewhere along the way I became Jaxx.  I'm a Southern girl married to a Southern boy living the nomadic military life, with our two kids and two dogs.  Oh, and I sew, a lot
After plastering Facebook walls and groups with snapshots of the items I create, I am sticking my toe into the waters of the blogging world.  It is my hope that I can share my interests with others and do so with greater detail than a quick "Look what else I made..." post on Facebook. 
I'm a tall girl, so most store-bought clothes don't fit me.  I'm talking by a couple inches too short!  As a child, my mother made me clothes that were long enough, but when I left home, I had to learn to do it for myself.  Its been at least 15 years since then, and there's no turning back. 
I'll mostly share about sewing, because that's what I do most, but I may branch out into other creative mediums.  We shall see where this venture takes me.
I find myself occupying a happy medium between routine and planning things out and operating with no plan at all.  I have no idea where this blog will go. But I'd love it if you joined me on this adventure. 

Blessings,
Jaxx